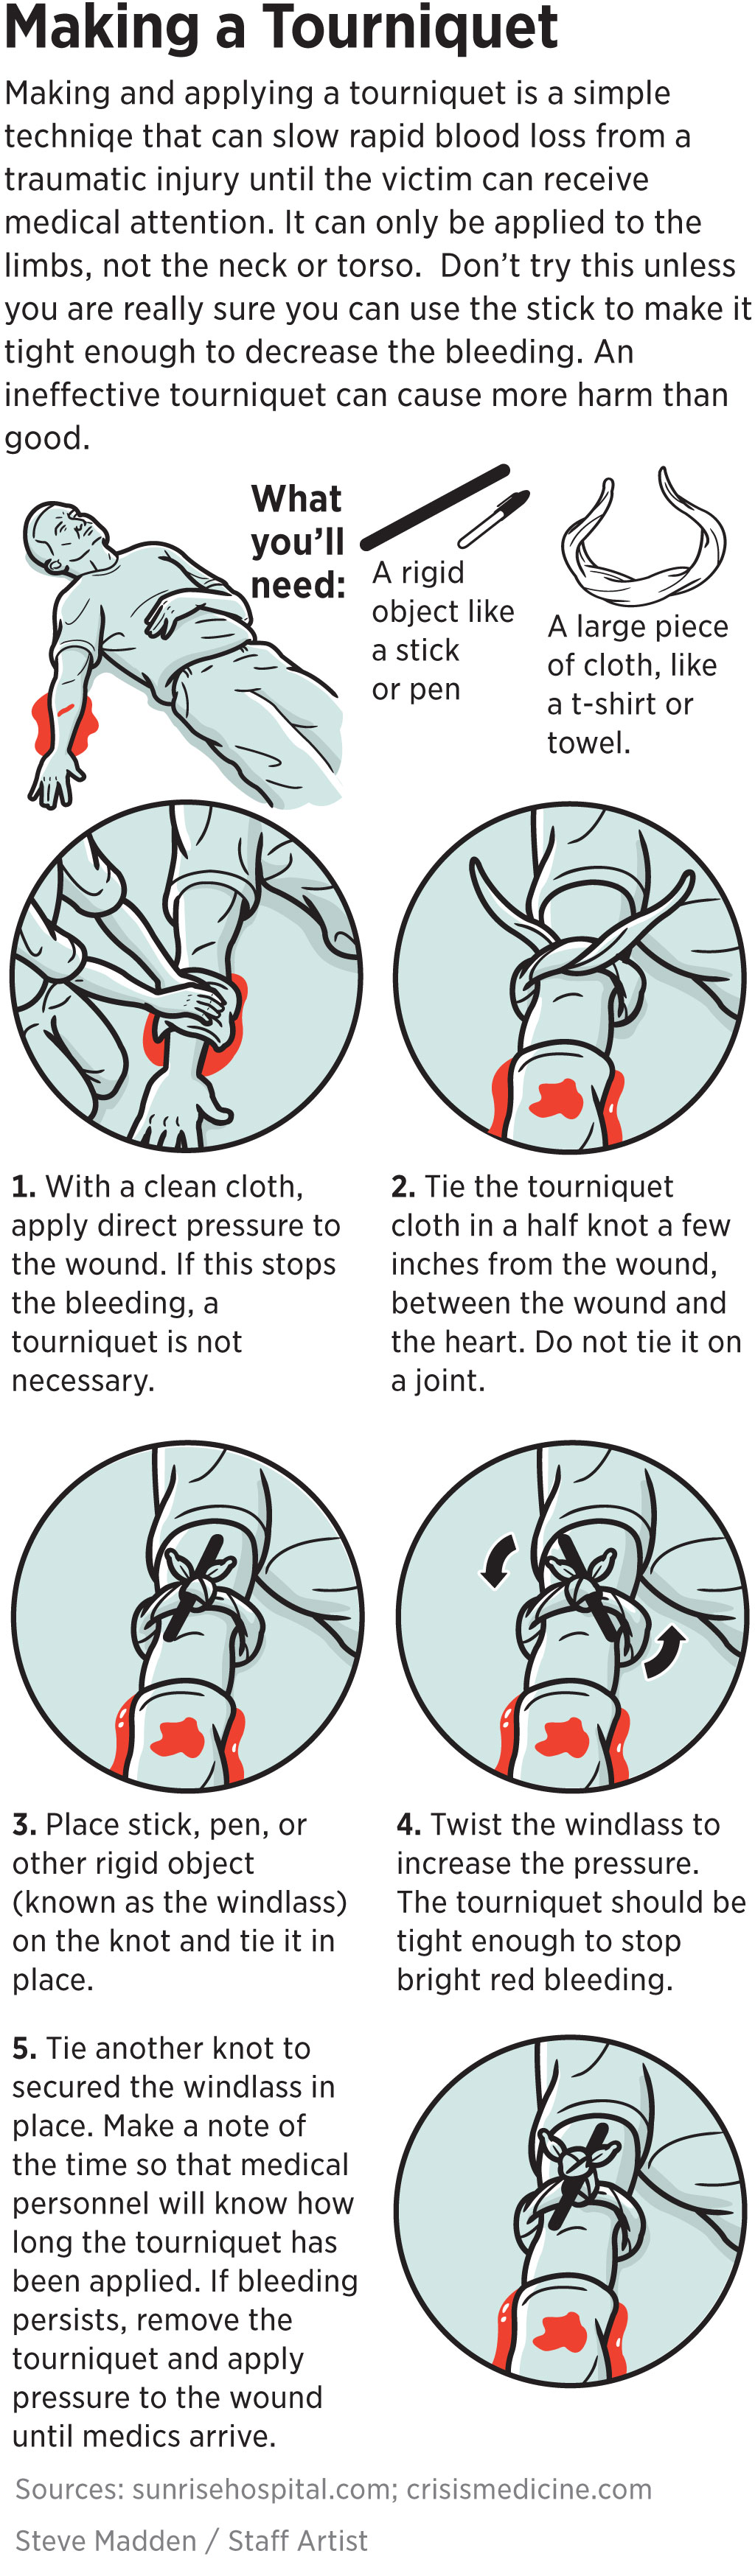
Making a Tourniquet
Making and applying a tourniquet is a simple technique that can slow rapid blood loss from a traumatic injury until the victim can receive medical attention. It can only be applied to the limbs, not the neck or torso. Don’t try this unless you are really sure you can use the stick to make it tight enough to decrease the bleeding. An ineffective tourniquet can cause more harm than good.
What you’ll need:
A rigid object
like a stick
or pen
A large piece
of cloth, like
a t-shirt or
towel.
1. With a clean cloth, apply direct pressure to the wound. If this stops the bleeding, a tourniquet is not necessary.
2. Tie the tourniquet cloth in a half knot a few inches from the wound, between the wound and the heart. Do not tie it on a joint.
3. Place stick, pen, or other rigid object (known as the windlass) on the knot and tie it in place.
4. Twist the windlass to increase the pressure.
The tourniquet should be tight enough to stop bright red bleeding.
5. Tie another knot to secure the windlass in place. Make a note of the time so that medical personnel will know how long the tourniquet has been applied. If bleeding persists, remove the tourniquet and apply pressure to the wound until medics arrive.
Sources: sunrisehospital.com; crisismedicine.com
Steve Madden / Staff Artist
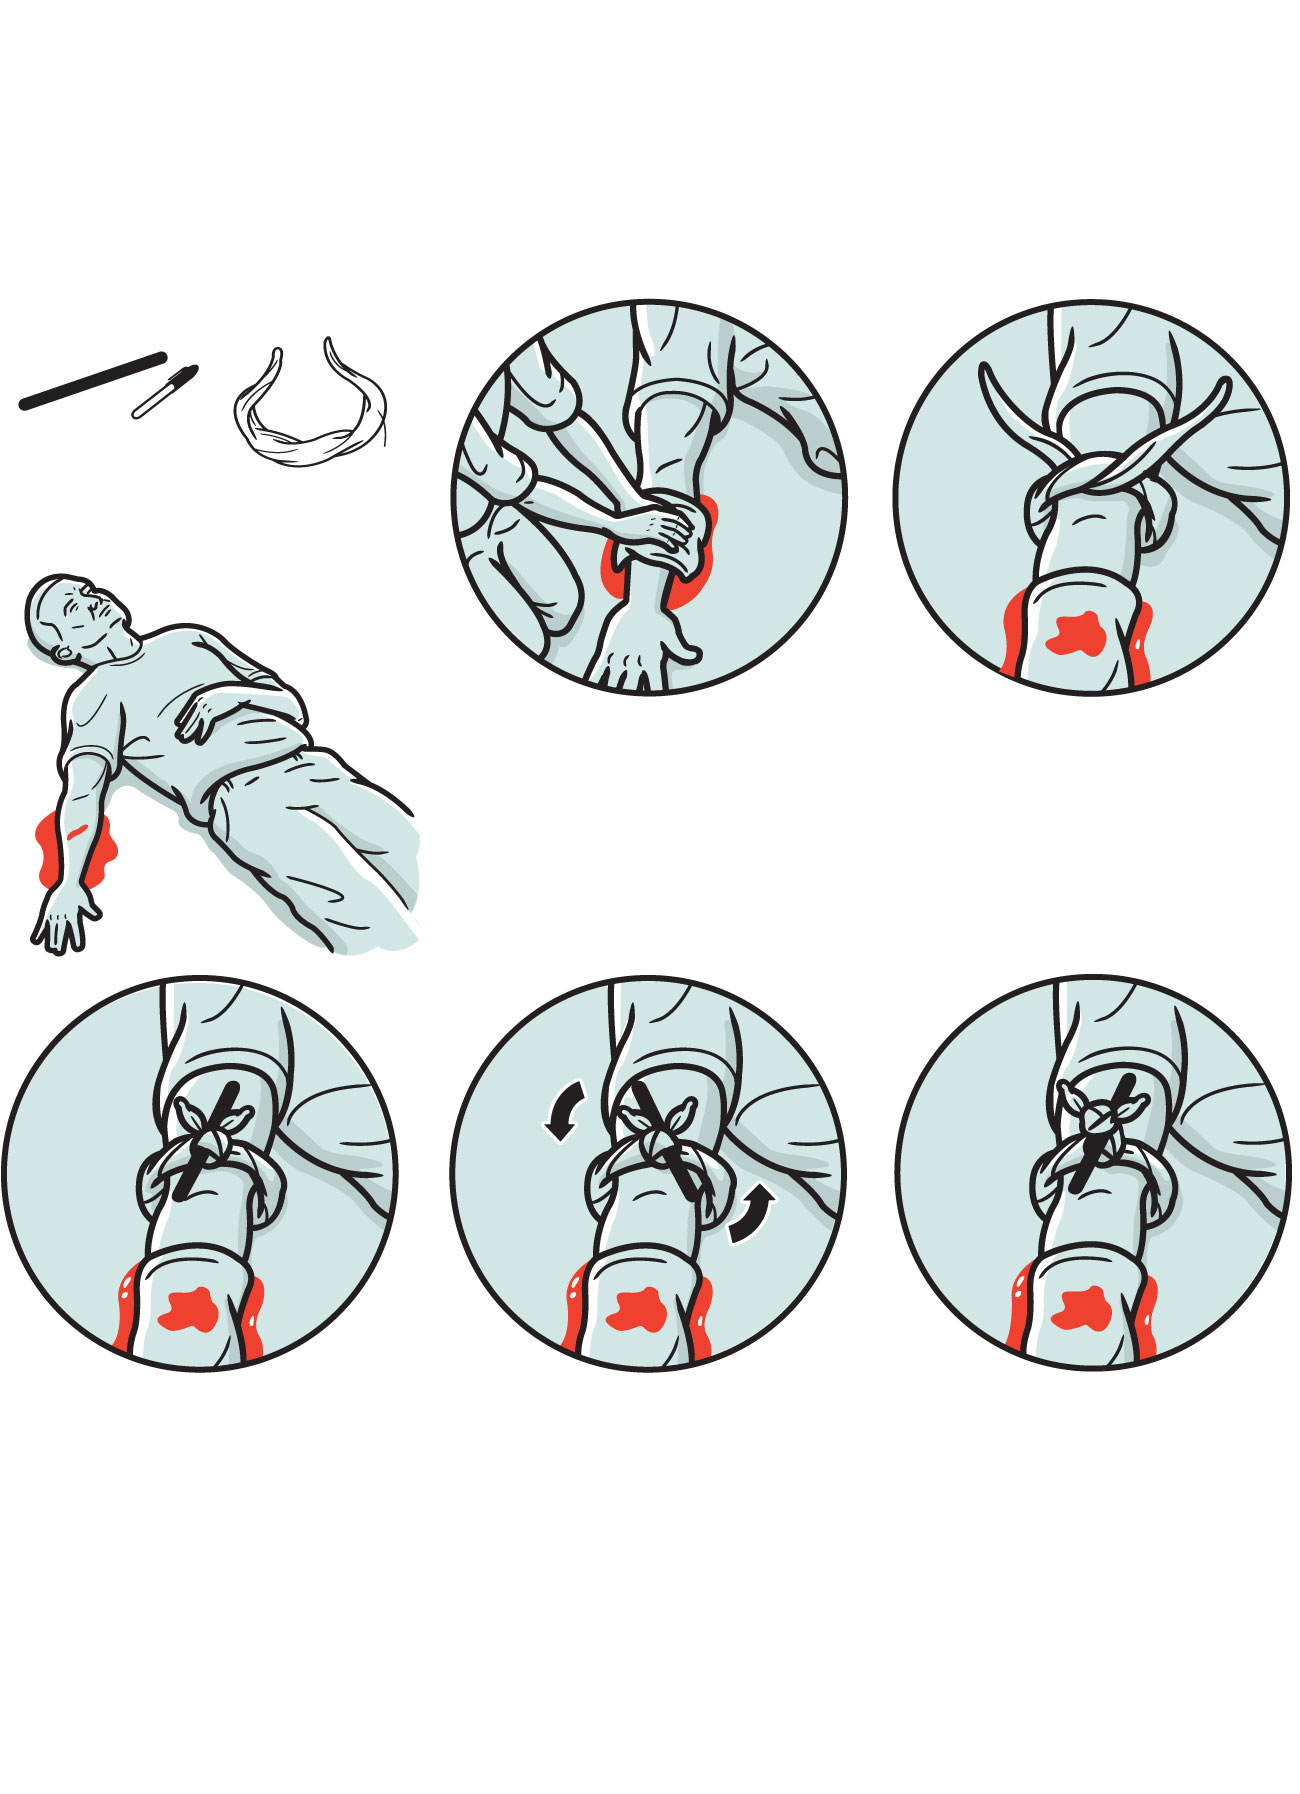
Making a Tourniquet
Making and applying a tourniquet is a simple technique that can slow rapid blood loss from a traumatic injury until the victim can receive medical attention. It can only be applied to the limbs, not the neck or torso. Don’t try this unless you are really sure you can use the stick to make it tight enough to decrease the bleeding. An ineffective tourniquet can cause more harm than good.
What you’ll need:
A rigid
object like
a stick
or pen
A large piece
of cloth, like
a t-shirt or towel.
1. With a clean cloth, apply direct pressure to the wound. If this stops the bleeding, a tourniquet is not necessary.
2. Tie the tourniquet cloth in a half knot a few inches from the wound, between the wound and the heart. Do not tie it on a joint.
3. Place stick, pen, or other rigid object (known as the windlass) on the knot and tie it in place.
4. Twist the windlass to increase the pressure.
The tourniquet should be tight enough to stop bright red bleeding.
5. Tie another knot to secure the windlass in place. Make a note of the time so that medical personnel will know how long the tourniquet has been applied. If bleeding persists, remove the tourniquet and apply pressure to the wound until medics arrive.
Sources: sunrisehospital.com; crisismedicine.com
Steve Madden / Staff Artist
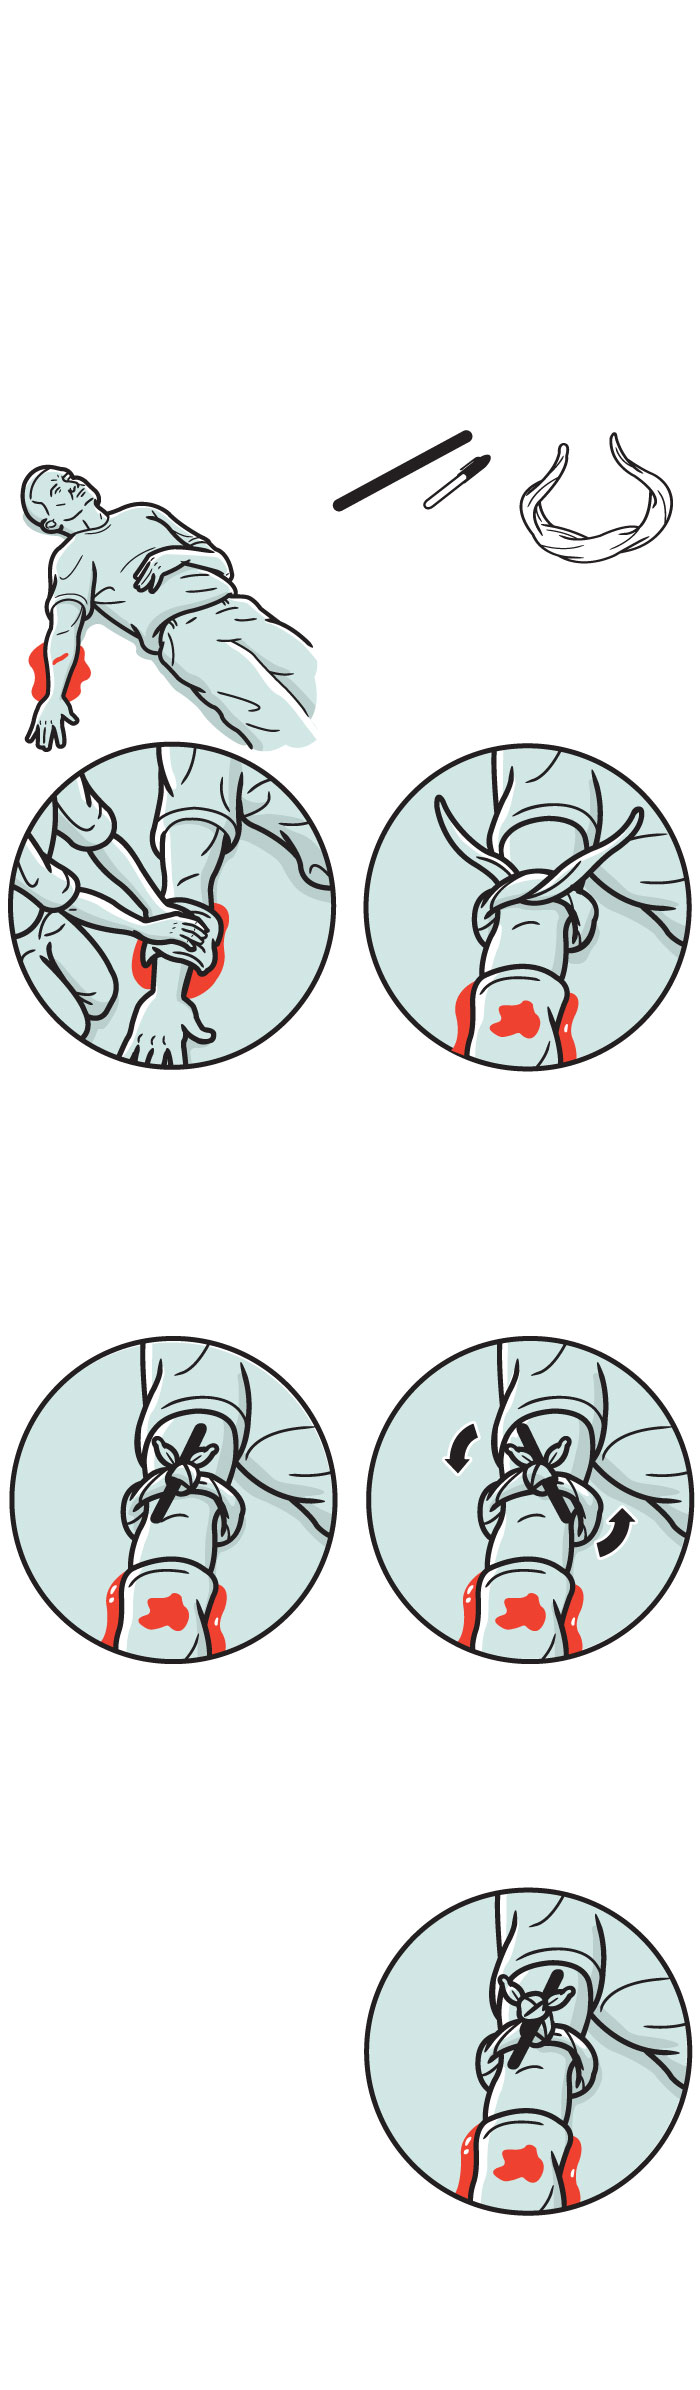
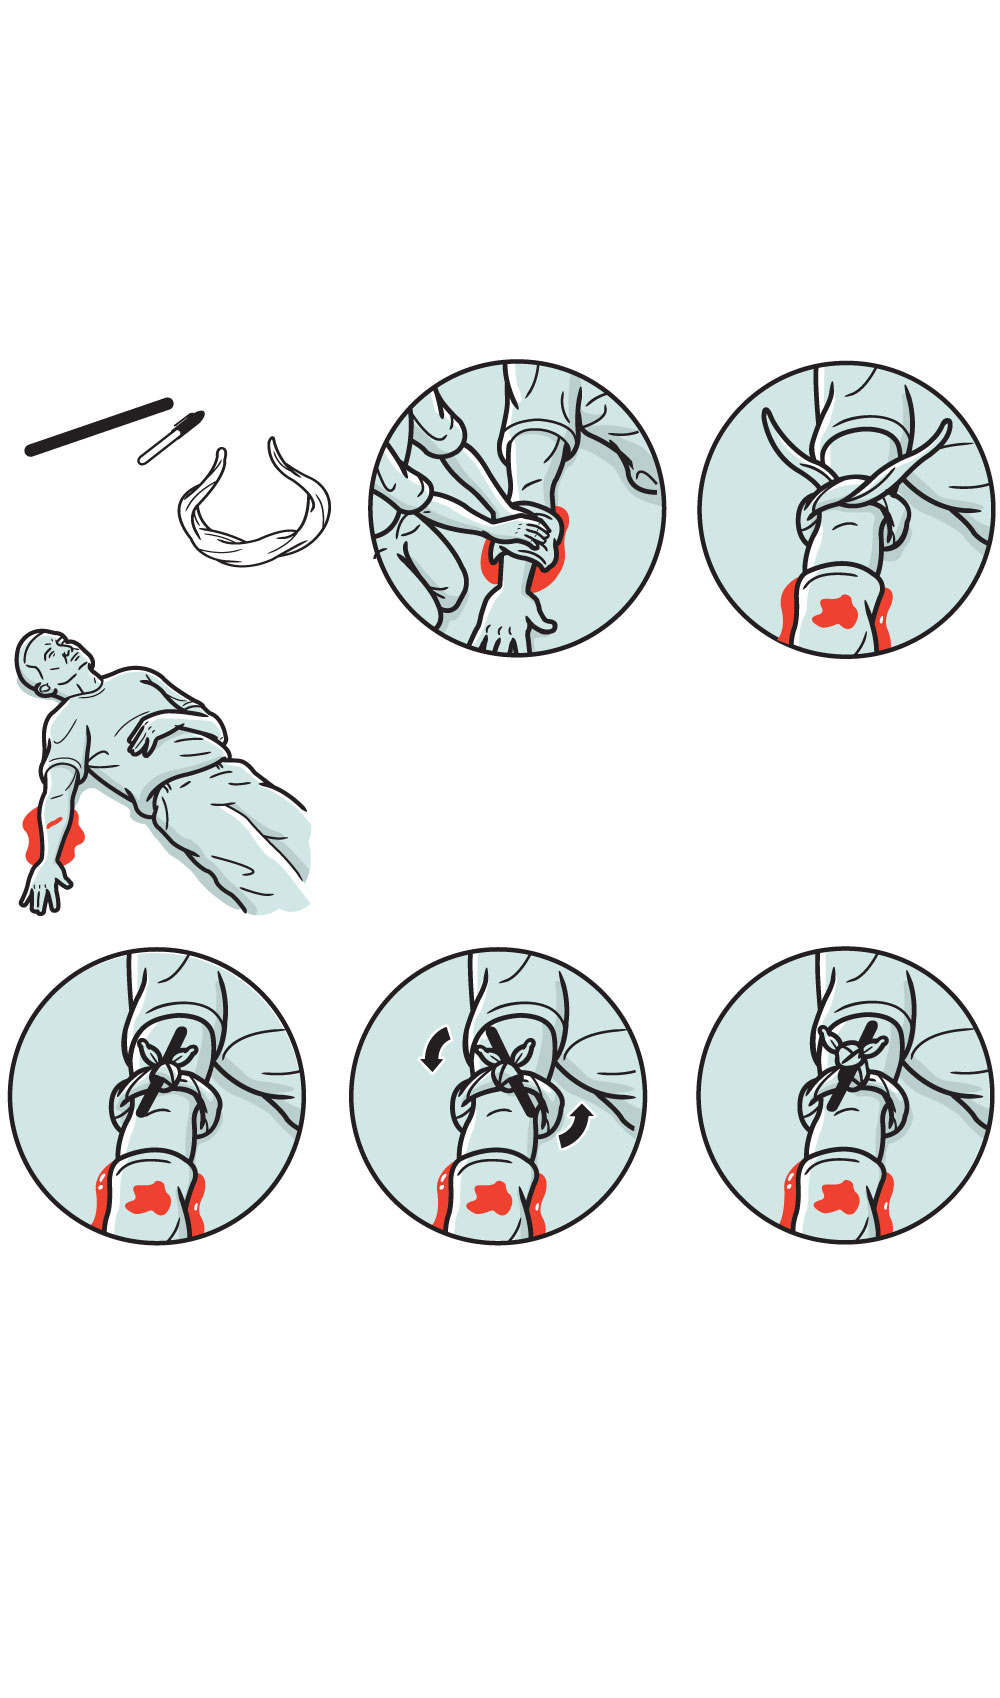
Making a Tourniquet
Making and applying a tourniquet is a simple technique that can slow rapid blood loss from a traumatic injury until the victim can receive medical attention. It can only be applied to the limbs, not the neck or torso. Don’t try this unless you are really sure you can use the stick to make it tight enough to decrease the bleeding. An ineffective tourniquet can cause more harm than good.
What
you’ll
need:
A rigid
object like
a stick
or pen
A large piece
of cloth, like
a t-shirt or
towel.
1. With a clean cloth, apply direct pressure to the wound. If this stops the bleeding, a tourniquet is not necessary.
2. Tie the tourniquet cloth in a half knot a few inches from the wound, between the wound and the heart. Do not tie it on a joint.
3. Place stick, pen, or other rigid object (known as the windlass) on the knot and tie it in place.
4. Twist the windlass to increase the pressure.
The tourniquet should be tight enough to stop bright red bleeding.
5. Tie another knot to
secured the windlass in
place. Make a note of
the time so that medical
personnel will know how
long the tourniquet has
been applied. If bleeding
persists, remove the
tourniquet and apply
pressure to the wound
until medics arrive.
Sources: sunrisehospital.com; crisismedicine.com
Steve Madden / Staff Artist